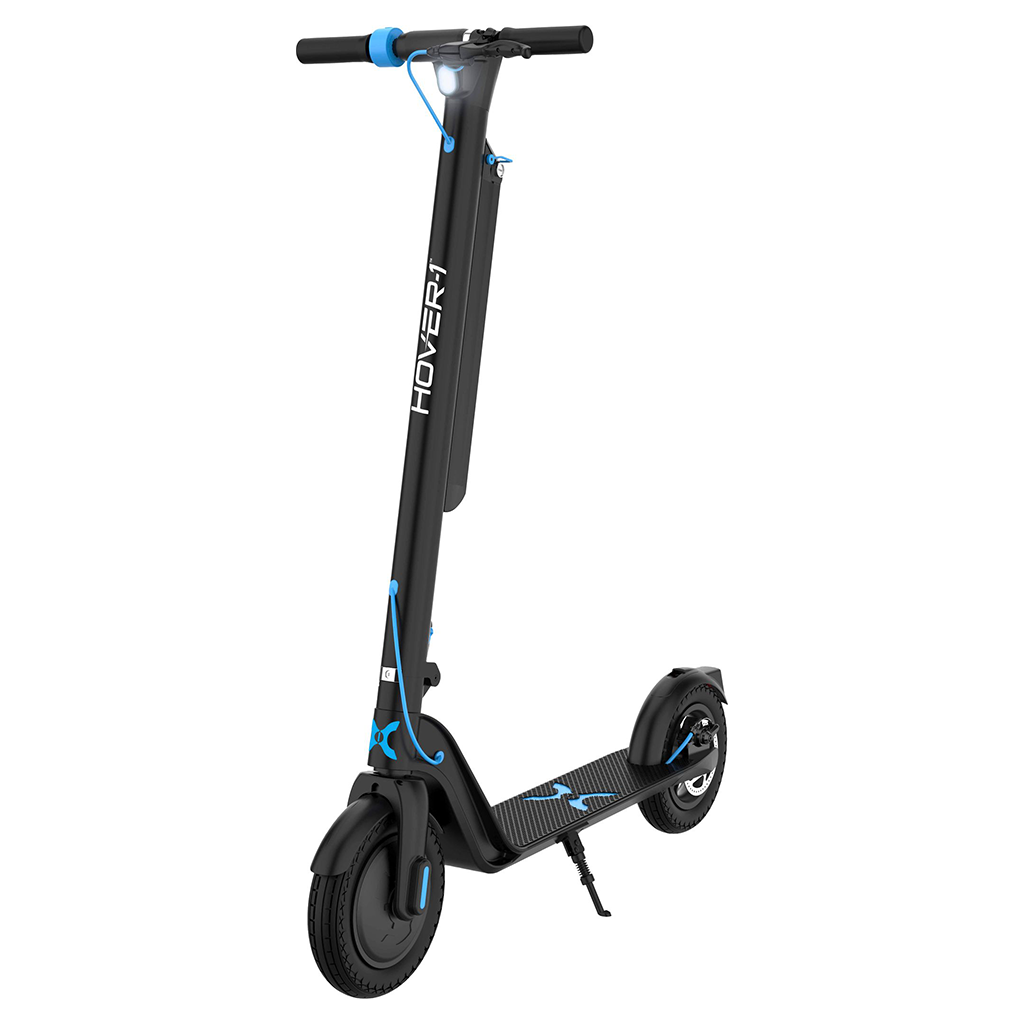
Hover-1 Highlander Pro Electric Scooter
H1-HRPRO
Level up with the new Highlander Pro! This extraordinary eScooter is built to hit speeds up to 15 mph and cruise along for 18 miles in a single charge. Not to mention, the Highlander looks as great as it rides. Featuring a disc and foot brake and a bright LED display & headlight, you can ride hard and bright at any time of day. Highlander comes equipped with two 10” pneumatic tires and a 350W brushless electric motor for a neat and comfortable ride with maximum stability
- Max Speed is up to 15 mph
- Max Distance is up to 18 miles
- Max Load is 264 lbs
- Max Incline is 15 degrees
- Tire Size is 10 inches
- Built in Rechargeable Battery
- Easily folds away to ensure simple storage and transportation.
Still need to register your warranty?
Highlander Pro Repair Guide
The Highlander Pro V2 has a key lock on the battery.
Description: Controller Error
Repair Time: 15 Minutes
Repair Instructions: Replace Controller
Description: Throttle Failure
Repair Time: 20 Minutes
Repair Instructions: Replace Throttle
- Take off the screws on the sides of the handlebar head and under the headlight (Philips)
- Disconnect the brake wire from the handlebar
- Unscrew the right handlebar grip
- Take the handlebar head off the scooter
- Take out the 4 screws inside the handlebar head, this will allow you to take off the plastic display cover
- Unplug the wire connecting the handlebar to the scooter
- Take off the 2 bolts holding the headlight on (5mm)
- Take off the 3 screws holding the display into the handlebar head (Philips)
- Unplug the throttle wire from the display and pull it out of the handlebar head
- Remove the old throttle from the handlebar (2.5mm)
- Feed the new throttle wire into and connect it to the display
- Put in the 2 headlight bolts (5mm)
- Connect the scooter wire to the display
- Screw in the 3 display screws (Philips)
- Put handlebar head back on the scooter
- Connect the brake wire
- Screw the right handlebar grip back in
Description: Brake Failure
Repair Time: 20 Minutes
Repair Instructions: Replace Handlebar Assembly
- Take off the screws on the sides of the handlebar head and under the headlight (Philips)
- Disconnect the brake wire from the handlebar
- Unscrew the right handlebar grip
- Take the handlebar head off the scooter
- Take out the 4 screws inside the handlebar head, this will allow you to take off the plastic display cover
- Unplug the wire connecting the handlebar to the scooter
- Take off the 2 bolts holding the headlight on (5mm)
- Take off the 3 screws holding the display into the handlebar head (Philips)
- Unplug the throttle wire from the display and pull it out of the handlebar head
- Remove the old throttle from the handlebar (2.5mm)
- Feed the new throttle wire into and connect it to the display
- Put in the 2 headlight bolts (5mm)
- Connect the scooter wire to the display
- Screw in the 3 display screws (Philips)
- Put handlebar head back on the scooter
- Connect the brake wire
- Screw the right handlebar grip back in
Product Manual
Still have questions or need technical support? Let us know!